
Yay-worthy Card | Vanishing Points
- Skill Level:
- Beginner
Project Description
What’s not to love about Lydia Fiedler’s simple celebratory card? Did the snail make you laugh? That tiny detail is optional, but we’re just not sure we can do without it! Brighten someone’s day with this bold design, or be the small voice that drops a note to celebrate a “yay-worthy” moment.
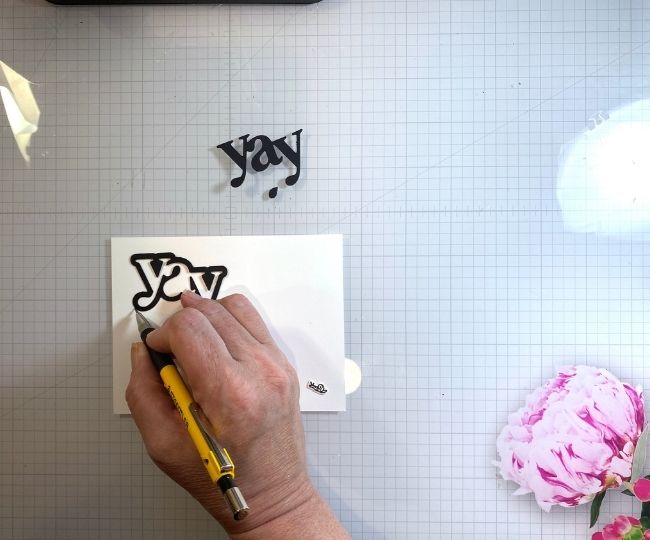
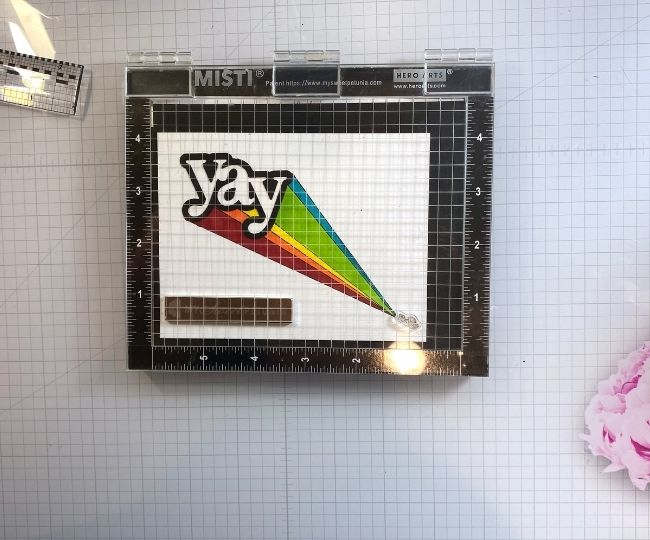
Step 1: Die cut the word “yay” from black cardstock – being sure to keep all three pieces cut by the die.
Step 2: Position the outline portion of the word die cut at the upper left side of your white card panel, to give you enough space below and to the right to create a vanishing point.
Note: You can also use the solid word portion of the die cut, and follow the rest of the steps for a different look.
Step 3: Using a pencil, lightly trace the bottom and right side of the die cut.

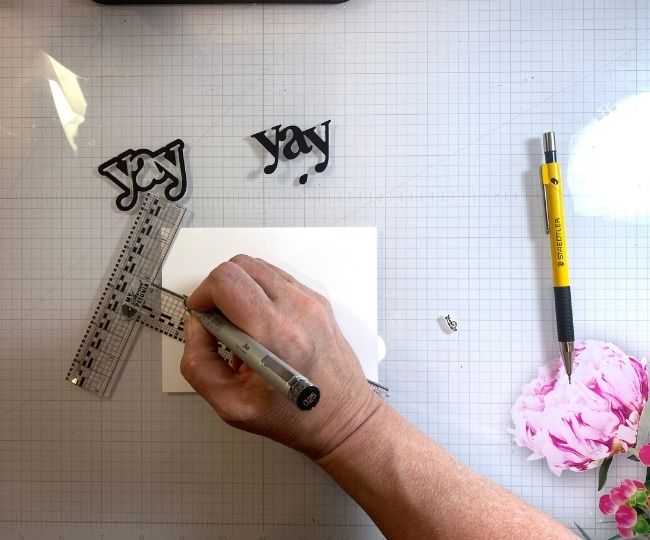
Step 4: Remove the die cut and choose a vanishing point at the lower right of your card – make a pencil mark there as a guide.
Step 5: Using a ruler and a fine point marker, draw lines from various points on the outline to the vanishing point – you can choose how many and where they begin.
Note: Be sure none of the lines cross any of the letters – so, for example, on the second Y, none of the lines cross the descending portion of the letter. The last line will begin at the upper right side of the word.


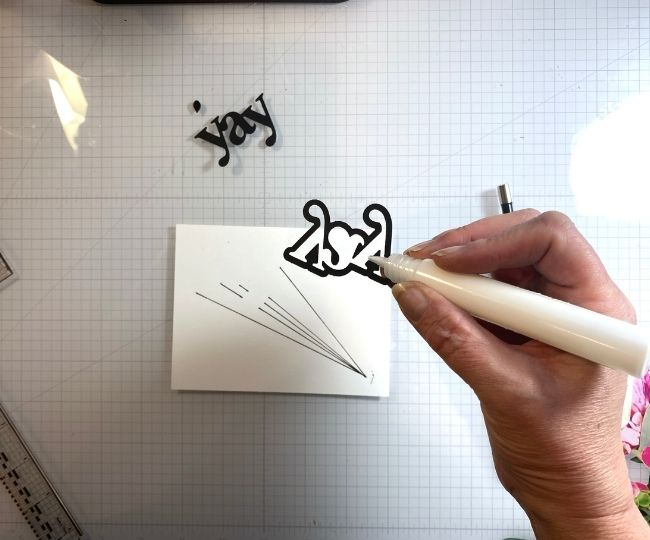
Step 6: When you are done with the lines, erase the outline you drew of the die cut, as well as your pencil mark at the vanishing point.
Step 7: Apply small dots of glue to the die cut, and place it on the card front. If using the outline, be sure and glue the small center of the “a” onto the card.

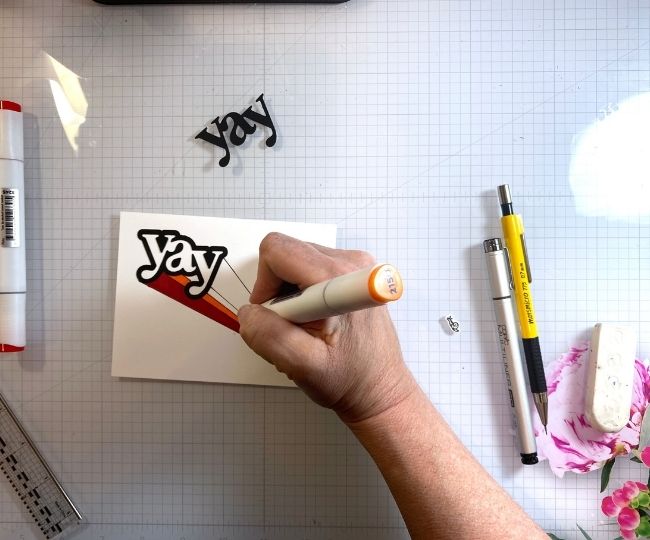
Step 8: Color* the spaces between the lines as desired with markers or pencils.
*Note: Since this example uses a black die cut, you can color right up to the edge. If you were doing this with a lighter color, then color your lines before gluing the die cut in place.

Step 9: If desired, position the card in the MISTI, or use an acrylic block and stamp the snail over the vanishing point in Intense Black ink, and color the snail if desired.
Step 10: Glue the card panel to a folded card base.


Awesome. Brings me back to the 4th grade. I can’t remember the teachers name, but she inspired me in so many ways.
We drew skyscrapers from the top down. She showed us how to use perspective in so many ways. I remember drawing an ant, tiny and then my name big! I will be making this card!
What a fun card–and a great tutorial!
What a fun project!
Brilliant! Both your design and the Makermeans site. Way to go!